
The INI switch AR_MANUAL_RECEIPT will not work together with this functionality.
(continued from Booking Invoice)
Some Tourplan users have the need to receipt an invoice as soon as it is issued – e.g., a payment by credit card. In the invoicing process outlined in the previous section, it would then be necessary to open the Debtors application to process the receipt. By setting a Fastbook INI switch, an Auto Receipting screen can be displayed which allows the receipt transaction to be created simultaneously with the invoice transaction if required.
To enable this functionality, the Fastbook INI setting FB_AUTO_RECEIPT must be set. There are three possible settings.
|
N |
No. The functionality is permanently switched off |
|
Y |
Yes. The functionality is switched on but the default checkbox to create the receipt automatically is not; the user must activate the switch each time they create an invoice/receipt from within the booking. |
|
A |
Always. The functionality is switched on and the default checkbox (to create a receipt automatically) is switched on. |
|
|
The INI switch AR_MANUAL_RECEIPT will not work together with this functionality. |
Screen Shot 118: Invoice/Auto Receipting Screen
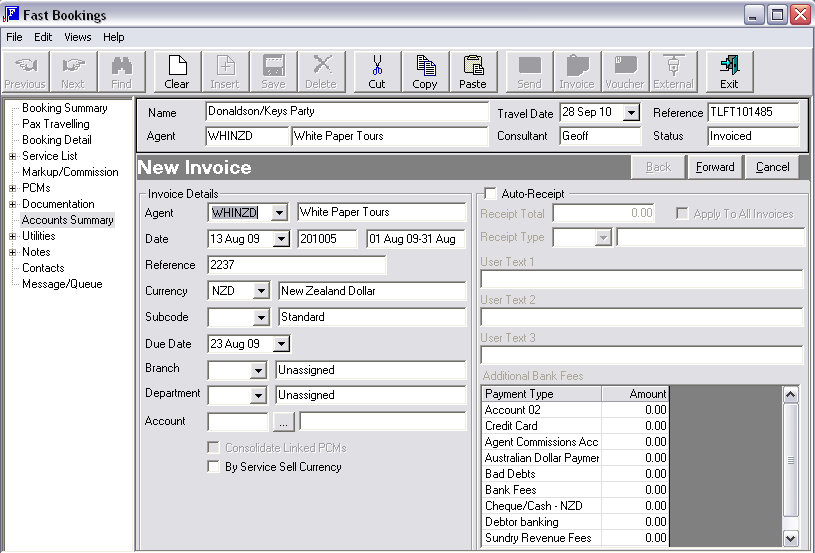
The Invoice details section of the screen is completed in the same way as already covered in Screen Shot 113: Invoice Header Screen.
If a receipt is to be issued concurrently with the invoice, check the ‘Auto-Receipt’ checkbox.
Receipt Total
Enter the receipt value. If an amount is entered in this field, it will be pro-rated evenly across all invoice lines. The receipt value does not have to match the value of the invoice being created and could be lower or high as required. If the receipt total is left as 0.00, the full value of the invoice will be receipted
Receipt Type
Select the receipt type from the drop down.
Three user-defined text fields can be labelled when the Receipt Type is set up in the Codemaint Module. The labels will not display until the receipt type is selected. In the example in Screen Shot 118: Invoice/Auto Receipting Screen, the user defined fields are labelled ‘Credit Card’, Card Number’ and Expiry date.
Apply to all invoices
A checkbox “Apply to all Invoices” can be used if there already exists one or more un-receipted invoices on the booking, for example a deposit invoice. Using this checkbox is only needed if the receipt is to apply to ALL invoices on the booking, including the one being created. If the receipt value is less than the total sum of invoices on the booking, the system will prorate the value of the receipt across all invoices. This is because at this point of the receipting process, Tourplan has to make a decision about which invoices have the receipt applied. Applying it to all invoices spreads the value equally to all invoices.
Using Auto Receipt and Apply to All Invoices without entering a receipt value will FULLY pay any existing invoices and the newly created invoice.
When entering the receipt details, there is also the option to enter the value of any bank charges related to the receipt process, as there is for standard receipts.
Screen Shot 119: Completed Auto Receipt Fields
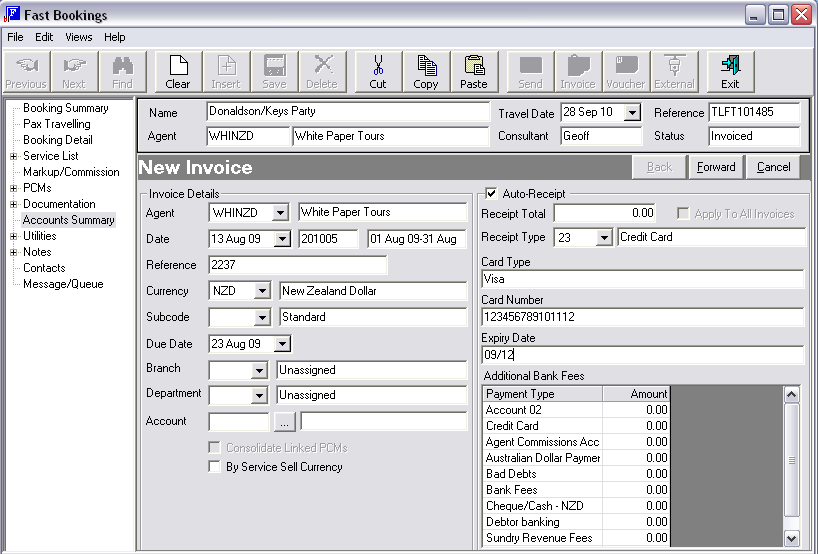
In the example above, the ‘Apply to all Invoices’ checkbox is greyed out since there are no unpaid invoices attached to the booking.
|
|
Click the ‘Forward’ button in the Button Bar at the top of the screen to continue to the Invoice Lines screen. Depending on the number of services in the booking, this screen may not appear for a few seconds. |
Screen Shot 120: Completed Invoice Screen
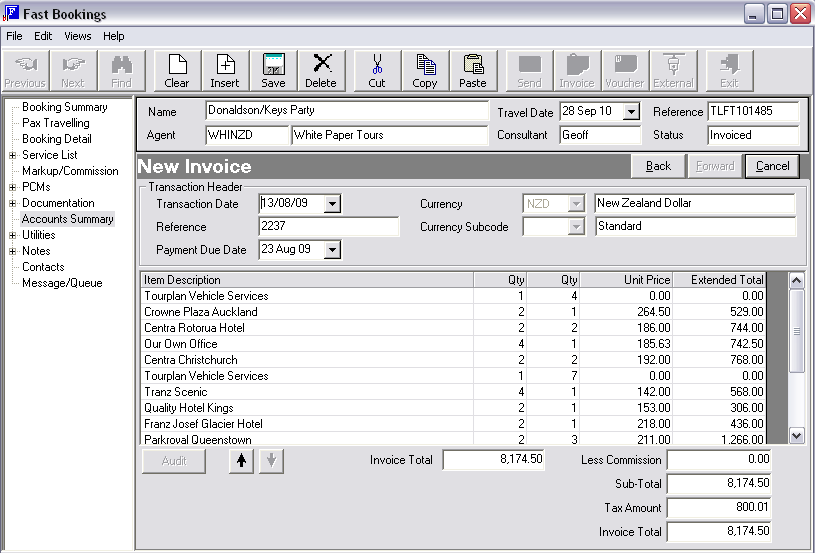
Once the invoice is saved, the system will create multiple receipt transactions, the receipt for the main receipt total, and one each for the bank fees that have a non-zero value, as per standard receipt functionality.
Pressing Save button at this point will prompt the standard invoice print function as seen in Screen Shot 116: Print Invoice Dialogue.
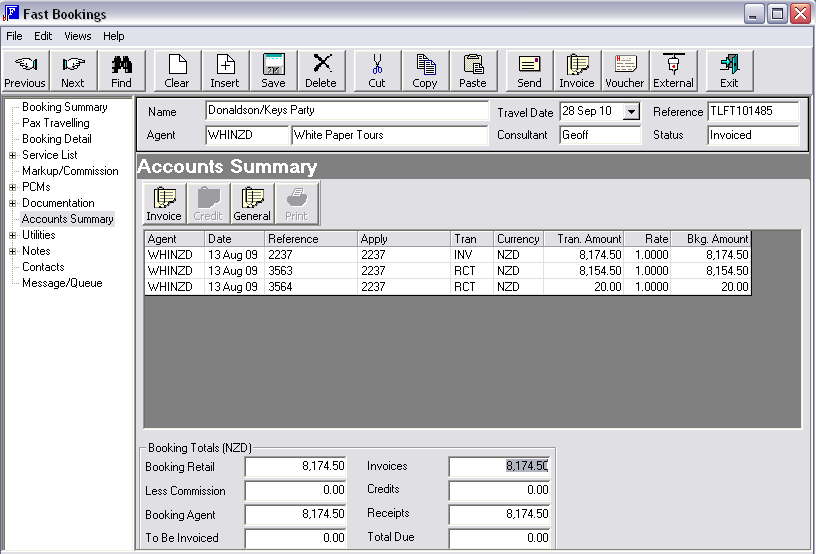
The result in the Accounts Summary screen will reflect the invoice and receipt as per standard functionality:
Screen Shot 121: Completed Accounts Summary Screen
(continued in Booking Utilities)
 Tourplan iS V2.07 FastBook Training Guide
